Getting started with Theatre.js
Theatre.js is an animation library for high-fidelity motion graphics. It is designed to help you express detailed animation, enabling you to create intricate movement, and convey nuance.
Theatre can be used both programmatically and visually:
Theatre works with all rendering stacks. You can use it to animate DOM elements, THREE.js objects, or any kind of JavaScript variable.
This guide will get you started with Theatre in minutes.
How to install
You can install Theatre either as an npm package, or just link to it via CDN (ala jQuery)
Option 1: Installing through npm
If you’re using a module bundler such as webpack, then you can use Theatre as an npm package:
$ npm install theatre
… and import it into your code:
// As an ES module:
import Theatre from "theatre"

// As a CommonJS module:
const Theatre = require("theatre")
Option 2: Installing via CDN
You can also get Theatre the old fashioned way from a CDN. Simply put a <script> tag somewhere in your HTML markup and make sure it runs before your main scripts:
<html>
  <body>
    <!-- This script gets the latest version of Theatre on the 0.2 branch from unpkg.com -->
    <script src="https://unpkg.com/theatre@0.2.x"></script>
    <script>
      console.log(Theatre)
    </script>
  </body>
</html>
If all has gone well, you should be able to see Theatre’s UI (called “the panel”) when opening the page in the browser:
What we'll be creating
Let's learn Theatre by doing the "Hello World" of animation, a bouncing object! This is how it'll look like:
You can find the finished project on CodePen and CodeSandbox.
Setting up the scene
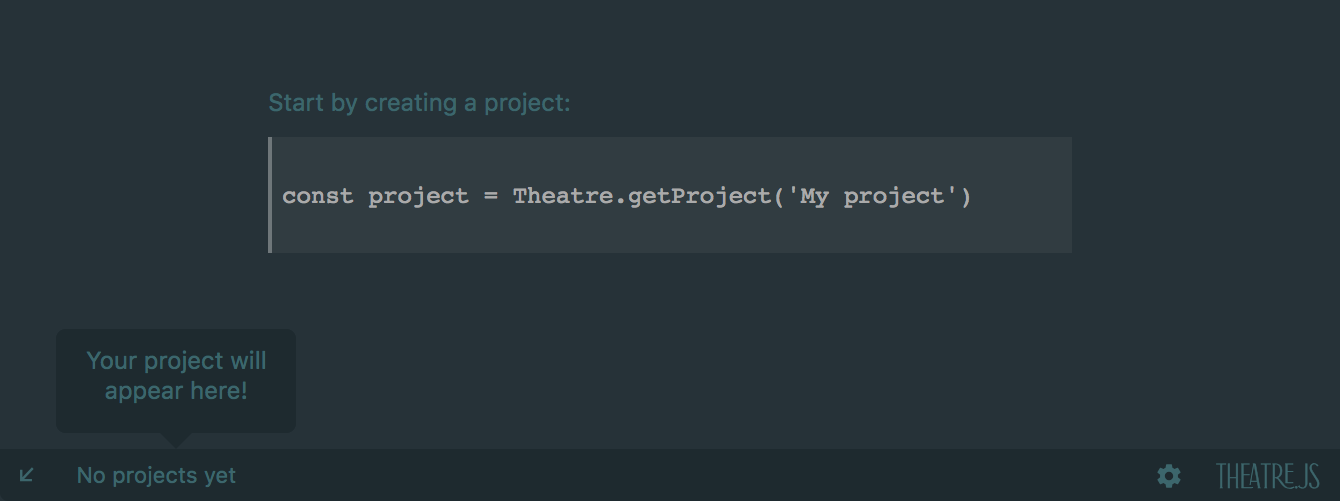
So, let's begin by creating a project.
Creating a project
If we put the following line in our script, Theatre will make us a project, named "My Project":
const project = Theatre.getProject("My project")
A project in Theatre is just like a project in Blender or After Effects. The difference is that instead of saving your project's state to the file system, Theatre saves it in your browser. More on that later.
Creating a timeline
In each web page, you could have one or more pieces of animation running at the same time. Some might be playing, some paused. Some may yet to be initialised.
These pieces of animation are stored on individual timelines. For our bouncing box, we only need one timeline, so let's go ahead and create one:
const timeline = project.getTimeline("Bounce")
That's all we need to set up our timeline.
Creating a box
Creating the native object
So, how do we plan to render our box?
We have tons of options. We have Canvas 2D or WebGL; we could use a library like THREE.js or Pixie, but, since we all know how to use the DOM, let's render our box as a simple <div>:
const nativeObject = document.createElement("div")
nativeObject.style.cssText = `
  position: absolute;
  left: 10vw;
  bottom: 0;
  width: 50px;
  height: 50px;
  transform-origin: center bottom;
  background: #EEE;
`
document.body.appendChild(nativeObject)
In Theatre's terminology, the <div> we just created is called a "native object". So whether it's made with THREE.js, the DOM, or some other technology, the final object to be rendered is called a native object. So in this guide, every time we use the phrase "native object", we mean the <div>.
The Theatre object
Now that we have a native object, we can introdue it to Theatre and put it inside the timeline:
// (1) Create a Theatre object inside our timeline:
const object = timeline.getObject(
  // (2) The name of the object is "The box":
  "The box",
  // (3) Leave a reference to the native object:
  nativeObject,
  // (4) Define the properties of our object. In this case, we plan to animate the object by
  // moving it up and down. So we'll only have one prop for now:
  {
    props: {
      // Call the prop "y" (name is up to us):
      y: {
        // And the type of our "y" prop is number:
        type: "number"
      }
    }
  }
)
Let's go through what we just did:
- We created a Theatre object on the timeline by calling
timeline.createObject(). We can put one or more objects in each timeline. - We gave our object a unique name,
"The box". - We left a reference to the nativeObject (the
<div>). As we learned before, a native object doesn't have to be a<div>. It can be a THREE.js object, or any other JS value, evennull. As we'll soon learn, it is up to us to instruct Theatre how we want our nativeObject to be controlled by Theatre. - We defined a prop for our object, called it
"y", and set its type tonumber.
Each object is made up of one or more props. A circle for example, could have an x and y prop to control its position. It may also have a radius prop.
In our example, we just start with a y prop as we only plan to move the object up and down along the y axis. We can add more props to our object later.
Prop types
Currently the only supported prop type is number which is suitable for most use cases. We're working on adding more prop types, including custom types, in future releases.
Changing a prop's value
At this point, we should be able to see our object and its one prop in the panel:
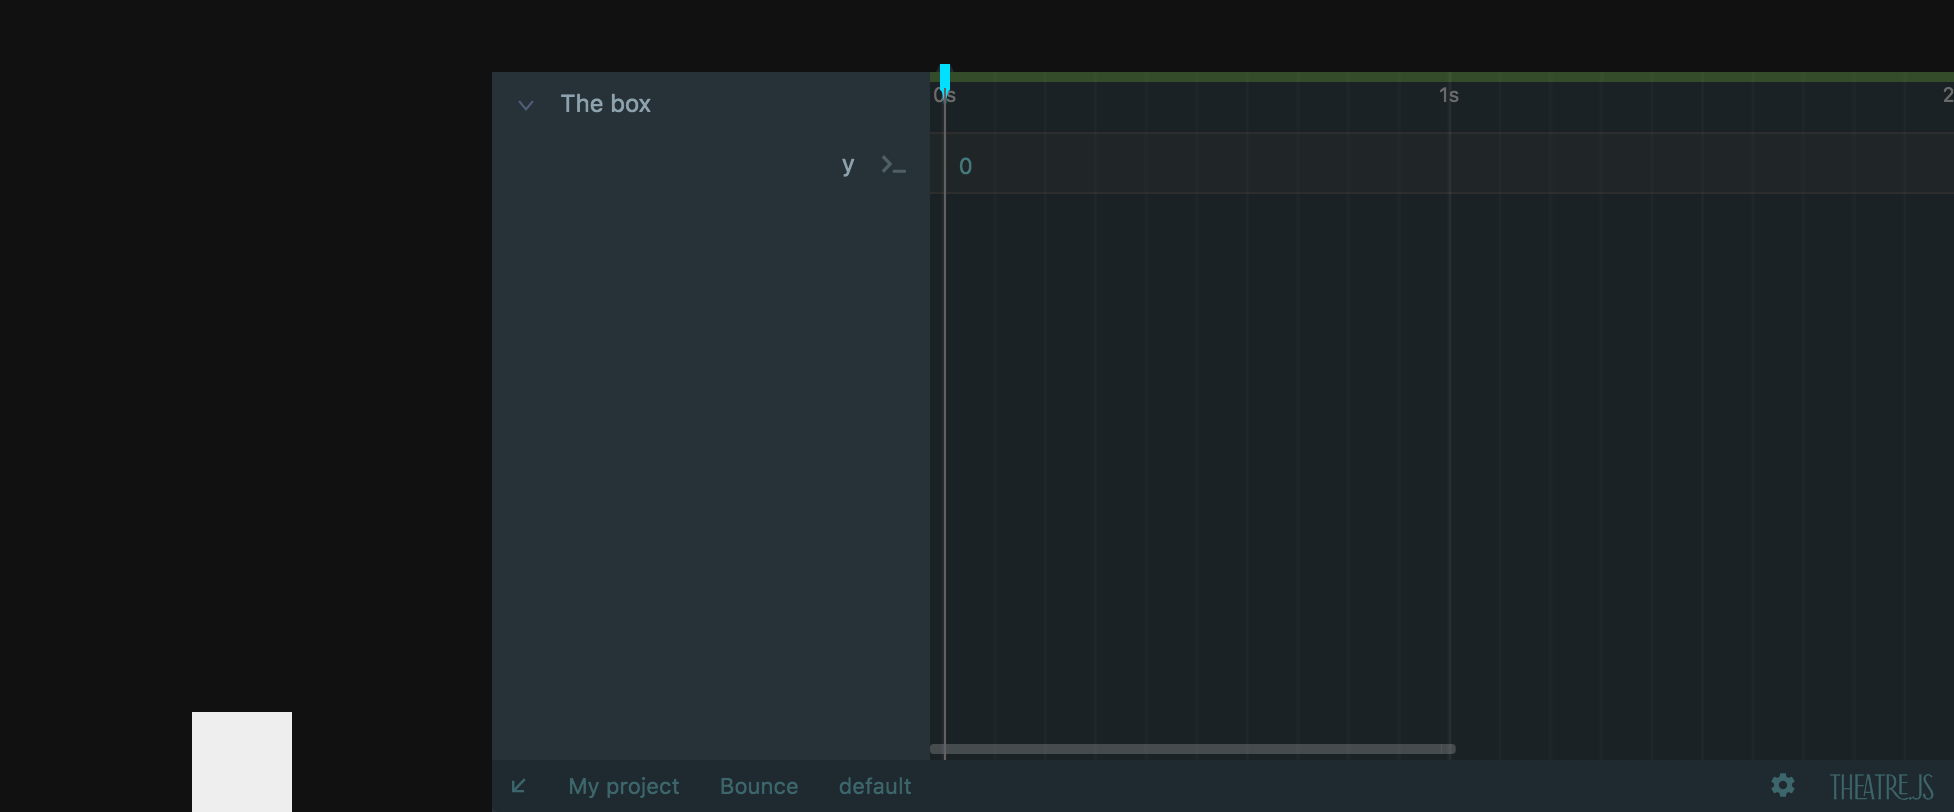
Now, what happens if we try to change the value of our prop? Let's click on the prop's value, change it and hit Enter:
So, even though we changed the value of y from 0 to 10, the box does not move. This is because we have yet to tell Theatre to change the <div>'s style.transform every time the y prop changes. Before we get to that, let's see what happens if we refresh the page.
Refreshing the page
If we try to refresh the page, the values of our props won't be reset. This is because when in development mode, Theatre saves the state of our projects in the browser's localStorage. At the end of the tutorial we'll learn later how to export this state to save it to a file and commit it to a git repo.
Listening to value changes
So, what do we have to do so that when we change the value of y, it would move the native object (the <div>) up and down?
The easiest way to do that is to use the object.onValuesChange() method. Let's see how it works.
Add these lines to the end of your script and refresh the page:
object.onValuesChange(newValues => {
  console.log(newValues)
})
Now open up your console and then try to change the value of y:
So, our callback gets called every time the value of y changes.
Now, just to get a better idea of how object.onValuesChange() works, let's add another prop to our object. Go back to where we defined our props, and add another prop, calling it "x":
    ...
    props: {
      y: {
        type: 'number'
      },
      // our new prop:
      x: {
        type: 'number'
      },
    }
    ...
Now change the value of x and see what we get in the console:
So this is how onValuesChange() works: Every time the value of any of the props of our object changes, it calls the callback, with the values of all of the props together. This makes it easy for us to wire these values to the native object (the <div>).
Now that we know how onValuesChange() works, we can remove the x prop as we don't need it for this animation.
Performance note
onValuesChange() only calls the callback at most once per animation frame. The value of the props are also cached behind the scenes, so the overhead is negligible for most scenarios.
If you think you need an even faster method to read the values from Theatre to your native object (such as writing them directly to a Typed Array), then please let us know. These methods exist, and we'll expose them as soon as we know you have a use-case for them.
Applying the value of y to the <div>
Now that we know how to read the props` values from Theatre, we can go ahead and apply them to our <div>. Let's do that in our callback:
object.onValuesChange(newValues => {
  const div = object.nativeObject
  div.style.transform = `translateY(${-newValues.y}px)`
})
So, let's see if it worked. Type the value in and hit Enter, or just drag the value up and down:
It works!
Setting up a scene can be easier
So what we did just now was to set up our scene completely manually. We defined the props of our object manually, and we set up onValuesChange() manually.
Luckily we don't have to do that for every object or every project. Instead, we can write a simple adapter that tells Theatre how to recognise the type of each object and set up its props accordingly. You can learn about adapters here.
Animation basics
We're all set up, code-wise. Let's do some animation!
Keyframes and tweens
One way to animate things in Theatre is keyframes (and there are more methods on the way). Let's enable keyframes in our y prop by converting it from static (which means its value remains the same throughout the timeline), to a keyframed one. We can do that by clicking on the toggle next to the prop:
The little circle in the timeline is our first keyframe. We can drag it horizontally to change its time, or click on it to manually input its time and value:
Let's add another keyframe. Hold Command on Mac, or Ctrl on PC, and click somewhere on the timeline to create a new keyframe:
Now let's assign a different value to our new keyframe:
We have two keyframes now. Let's scrub through the timeline to see how they affect the box. Click and drag anywhere on the timeline to drag the seeker to a different time:
So, the box jumps at the 1 second mark, where the second keyframe is placed. To make this movement gradual, we should put a tween between our keyframes.
Hold Command on Mac, or Ctrl on PC, and hover over one of the keyframes. Then click and drag in the direction you want the tween to be created:
We can now scrub through the timeline to see how our tween affects the movement. We can also hit Spacebar to play the animation:
Easings
By default, a new tween has an ease-in-out curve. Let's change the easing of our new tween and see how that would affect the pacing of the animation. Click and drag the handle on the bottom of the prop to expand it:
Now we can play with the handles. They're the control points of a bezier curve, similar to those in CSS transitions:
Undo/Redo
To Undo an action, press Command+Z on Mac, or Ctrl+Z on PC. To redo, press Command+Shift+Z on Mac, or Ctrl+Shift+Z on PC. You can go up to 100 steps back in history, even after refreshing the page. We'll expand this number in future versions.
Deleting keyframes and tweens
We can delete our keyframes or the tween by right-clicking on them and choosing "Delete":
Doing it faster with a keyboard shortcut
There is a faster way to delete things in Theatre.
See how the "D" letter is highlighted when we right-click on the keyframe?
This means that "D" is the shortcut for the "Delete" item. Let's use it to delete things faster.
Hold "D" and simply click on a keyframe or a tween to delete it:
Ensure keyboard shortucts work
Some browser extensions, such as Vimium, capture most keystrokes which may interfere with Theatre's shortcuts. In case a shortcut doesn't work, consider adding the page to Vimium's ignore list.
If you're using CodePen, all keystrokes are captured by CodePen's code editor, so Theatre won't have a chance to react to them. To avoid this, make sure CodePen's editor is out of focus when you're interacting with Theatre's panel. You can test that by typing in any character. If the character appears in CodePen's editor, it means it is still in focus.
Selections
Yet another way to delete keyframes is to put them in a selection and delete the selection.
Hold Shift and drag a selection around our keyframes:
Now we can move our selection around, or delete its content (yes, D+Click works too):
We've now learned all the tools we need to make a simple fall and bounce animation.
The fall and bounce animation
Since the box is dropped from above the ground, it would start slowly, speed up as it hits the ground, and bounces back up. We're assuming no friction here, so the box would reach the height it was dropped from:
So, an ease-in and an ease-out. Simple! But we can do more:
Squash and stretch
Let's make our animation more interesting by adding a bit of squash and stretch to the movement. We want the box to stretch on its way up and down, and squash as it hits the ground.
This needs a new prop. Let's call it stretch and add it to our object's config:
    ...
    props: {
      y: {
        type: 'number'
      },
      // the new 'stretch' prop:
      stretch: {
        type: 'number'
      },
    }
    ...
A stretch of 1 means the box is a perfect square. 0 means it's completely flat (no height), 0.5 means it's half as tall and twice as wide, and 2 means it's twice as tall and half as wide. Let's implement that in our onValuesChange() callback:
object.onValuesChange(newValues => {
  const div = object.nativeObject
  div.style.transform =
    `translateY(${-newValues.y}px) ` +
    `scaleY(${newValues.stretch}) scaleX(${1 / newValues.stretch})`
})
So basically, scaleY is the inverse of scaleX. Let's see how that works:
Stretch can't be 0
Make sure to set stretch to some value other than 0. Otherwise we'll have scaleX(Infinity), which is not valid CSS.
Now that stretch is set up, it's just a matter of playing around with the keyframes until we're happy with the result:
Theatre's UI
Before we move further, let's get ourselves a bit more comfortable with the panel.
Scrolling
We can scroll through time either using the normal horizontal scroll gesture, or the scrollbar on the bottom:
Swipe to go back is disabled
Safari's swipe-to-go-back gesture is disabled while the pointer is over Theatre's panel. However, if the panel is being shown in an iframe (such as on CodePen), this gesture might still register.
Pinch to zoom
Pinch to zoom works as expected. If your pointing device does not support this gesture, you can Shift+Scroll vertically to zoom in and out. The scrollbar's edges on the bottom are also controllable:
We can also use the scrollbar's edges to zoom in and out:
Resizing the panel
The panel is resizable:
And we can completely hide it from the view:
Playback range
Sometimes we want to focus on a certain part of the timeline and it would be helpful if playback was limited only to that range. Here is how we can do that:
Hold Shift and click and drag on the strip on top of the timeline to create a playback range. Then put the seeker within that range and hit play (Spacebar). Playback will be limited to that range.
You can also re-adjust the range, or remove it completely:
Playback range is temporary
Note that the playback range is a temporary setting. It will be ignored if timeline is played by an API call or if it's played in production. The actual length of a timeline is set using its duration indicator (explained below).
Shortening/extending the timeline
By default, a timeline is two seconds long. We can adjust that by dragging the duration indicator:
Controlling playback through the API
Let's say we want our box to do the bounce animation when we click on it. The timeline provides an API for us to do just that:
nativeObject.addEventListener('click', () => {
  timeline.play()
})
... and voila!
Timeline's API
We won't be using more of the timeline's API, but here is what's available for controlling playback:
// Jump to 00:00:02 (zero hours, zero minutes, two seconds)
timeline.time = 2000
// Read timeline's current time (in milliseconds)
console.log(timeline.time)
// Play once, from the current time to the end
timeline.play()
// Pause
timeline.pause()
// Play once at half speed
timeline.play({rate: 0.5})
// Play once from 00:00:01 through 00:00:02 (one second to two seconds)
timeline.play({range: {from: 1000, to: 2000}})
// Play twice
timeline.play({iterationCount: 2})
// Play twice in reverse
timeline.play({iterationCount: 2, direction: "reverse"})
// Play twice, in alternate directions (forward and then backward)
timeline.play({iterationCount: 2, direction: "alternate"})
// Play twice, in alternate directions, starting with reverse direction (backward and then forward)
timeline.play({iterationCount: 2, direction: "alternateReverse"})
// Play and repeat
timeline.play({iterationCount: Infinity})

// timeline.play() returns a promise that gets resolved when playback has finished or has been inerrupted
timeline.play().then(finished => {
  console.log(finished === true ? "Played through" : "Playback was interrupted")
})
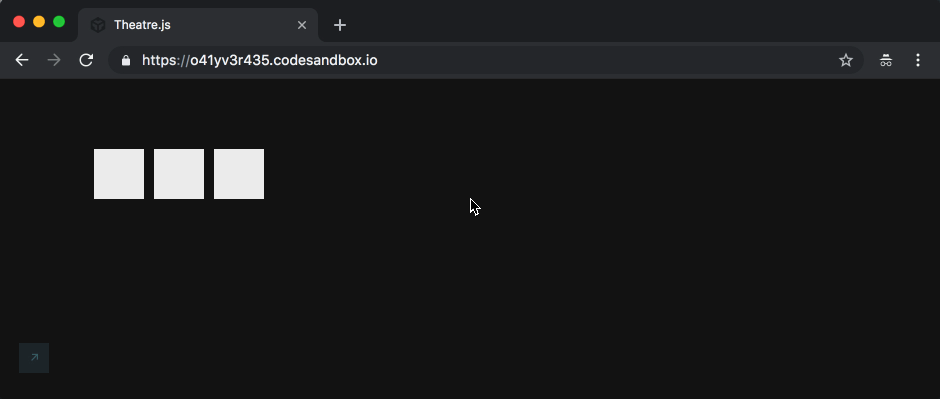
Multiple instances of the same animation
So, what if we wanted to use our bounce animation on three boxes instead of one? For an effect that looks like this:
This is easy to achieve. All we have to do is to move our code into a function so we can call it 3 times instead of just once. Let's call this function createBox(). We'll also change a few lines inside the function, which we'll discuss shortly. I've highlighted the changed lines:
const createBox = (project, i) => {
  const nativeObject = document.createElement('div')
  nativeObject.style.cssText = `
    position: absolute;
    left: calc(10vw + ${i * 60}px);
    bottom: 0;
    width: 50px;
    height: 50px;
    transform-origin: center bottom;
    background: #EEE;
  `
  document.body.appendChild(nativeObject)

  const instanceName = 'Box ' + i
  const timeline = project.getTimeline('Bounce', instanceName)

  nativeObject.addEventListener('click', () => {
    timeline.play()
  })

  // Create an object:
  const object = timeline.getObject(
    // The name of the object is "The box":
    'The box',
    // Leave a reference to the native object, which in this case is a div:
    nativeObject,
    // Define the properties of our object. In this case, we plan to animate the object by
    // moving it up and down, along the y axis. So we'll only have one prop for now:
    {
      props: {
        // Call the prop "y":
        y: {
          // And the type of our "y" prop is number:
          type: 'number',
        },
        stretch: {
          type: 'number',
        },
      },
    },
  )

  object.onValuesChange(newValues => {
    const div = object.nativeObject
    div.style.transform = `translateY(${-newValues.y}px) scaleY(${
      newValues.stretch
    }) scaleX(${1 / newValues.stretch})`
  })
}

for (let i = 0; i < 3; i++) {
  createBox(project, i)
}
All of the changes above are self-explanatory, except for these two:
...
const instanceName = 'Box ' + i
const timeline = project.getTimeline('Bounce', instanceName)
...
Here we have added a second argument to project.getTimeline(), called instanceName. For the first box, instanceName would equal "Box 0", and the second would equal "Box 1".
So what does instanceName do?
When we call project.getTimeline(timelineName, instanceName), Theatre returns a timeline that has the exact same set of keyframes and configuration as timelineName, only with an independent playback state (playback state is the timeline's current time, whether it's playing or paused, etc.)
As we call project.getTimeline multiple times with the same timelineName but different instanceNames, the returned timelines will share their animation data but will control different objects and have independent playback states.
We can even inspect each instance separately in the panel:
In fact, if we don't provide an instanceName, Theatre assumes the string "default" as the instanceName.
Multiple projects, multiple timelines
Similar to having multiple instances of the same timeline, we can also have multiple timelines by giving them unique names:
const timeline1 = project1.getTimeline('Timeline 1')
const timeline2 = project1.getTimeline('Timeline 2')
And that works with projects too:
const project1 = Theatre.getProject('Project 1')
const project2 = Theatre.getProject('Project 2')
And here is how we can choose which project/timeline/instance we want to work on in the panel:
Namespacing
In large projects, we can namespace the name of our timelines for easier management:
const confetti = project.getTimeline('Big Scene / Effects / Confetti')
const fireworks = project.getTimeline('Big Scene / Effects / Fireworks')
Each / divides the name of the timeline into two, creating a tree hierarchy:
Exporting to production
We're done with all the basics, and our animation is looking good! Let's take the final step and export our work to production.
Development mode
So far in this tutorial, we've been using Theatre in development mode.
Development mode includes both Theatre's API and the GUI (the panel). Also, as we use the panel to create and tweak keyframes, the state of our project is saved to local storage.
So, what happens if we open our page in a private window (where local storage is blank)? Our scene will be there, but the timeline will be empty (all props will be seem to be set to 0).
Saving sate to a file / git
Let's make sure that our animation is still there even if we open the page in a private window.
First thing we gotta do is to get a copy of the state of the animation. This is available in Tools -> Export -> Copy to Clipboard, which copies the state of our current project into the clipboard as a JSON string:
We can then paste this JSON string in a JSON file (this requires that your bundler recognises .json files), or simply paste it inside our code and feed it as the second argument to Theatre.getProject():
...
const state = {...} // <-- paste the JSON string here

const project = Theatre.getProject("My project", {state: state})
...
Now, if we open the page from a private window, or from a different machine, our animation will still be there.
We can now save our files to version control. If someone opens our page, they'll see it where we left it off. They can continue working on the animation, and then re-export and overwrite the state constant we defined above. If there is a conflict between your version and their version of the state, Theatre will let you know and will give you options.
Core build
The very last step to do is to use Theatre's "core" build, which is a lightweight build of Theatre suitable for shipping to production.
CodePen / CodeSandbox
If you're sharing your code on a community like CodePen, it's probably better to leave Theatre in its development mode, so others can tweak your work, fork it and and come up with their own variations. By doing that, you'd also be helping us introduce Theatre to more people ^_^
If you're using a module bundler, you can use the core build like this:
// ES Modules
// import Theatre from 'theatre' // <-- development build
import Theatre from 'theatre/core' // <-- core build

// CommonJS
// const Theatre = require('theatre') // <-- development build
const Theatre = require('theatre/core') // <-- core build
And same way with a script tag:
<!--<script src="https://unpkg.com/theatre@0.2.x"></script> --> <!-- development build -->
<script src="https://unpkg.com/theatre@0.2.x/core.js"></script> <!-- core build -->
The core build weighs at only 12 KB and has the same functionality as the development build, without the GUI.
Demo on CodePen
The project we just created is available on CodePen.
What's next?
We just learned how to use Theatre using its low-level API. Now that you know the low-level API, you can write simple wrappers to fit this API in your preferred UI stack. Here is one example where we've written a couple of functions to use Theatre in React with hooks.
Adapters are also a great way to make your Theatre-related code less verbose.
What if there is an error?
It's a good idea to keep an eye on the console. Often when an API is used the wrong way, Theatre will display a helpful error message in the console, often with an example of how to fix it.
How to reach us?
Got questions? Found a bug? Or just want to chat?
We're on the forum and happy to take emails and calls, so don't be a stranger 😉.